This page contains affiliate links to Amazon. As an Amazon Associate I earn from qualifying purchases.
When you take a photo with DJI series drones like an Inspire, Phantom, or Mavic the image file can be saved to the SD card as a JPEG file, a RAW (DNG) file, or both a JPEG file and a RAW (DNG) file.
- JPEG: This is the default file format for saving photos with DJI drones. JPEG is a common picture format that can be opened by almost any picture viewer or editor. JPEG is a compressed format so this type of file will take up the least amount of space on your SD card. However, because it is a compressed file you can be limited in updating the photo in post production.
- RAW: RAW files are much less compressed so there is a better chance of being able to fix issues with the image in post production. RAW images have much larger file sizes. After updating RAW images in photo editing software they can be saved to JPEG format to have a smaller file size.
- JPEG + RAW: When you take a photo with this option a JPEG file and a RAW file are saved to the SD card. This is a good option to have a JPEG version that can be quickly emailed or transferred to other people or media and have a RAW file that you can update in photo editing software. The drawback to this option is it takes up the most space on your SD card and any other hard drive you transfer your photos to.
To learn more about the differences between using these image formats with a DJI drone check out this link from DJI: JPEG vs RAW
Steps To Update The Image Format
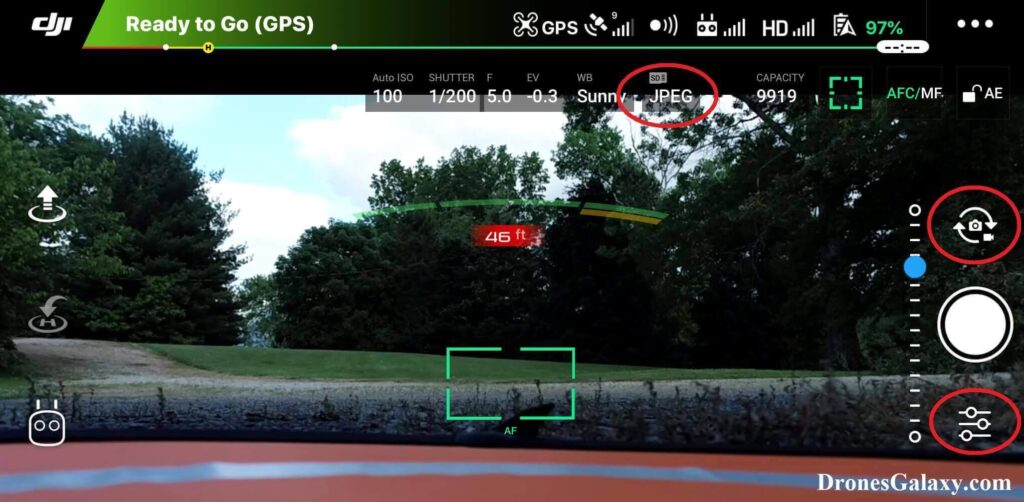
The following steps were written using the DJI Phantom 4 Pro V2. The other DJI drones like the Inspire or Mavic series will have the same or similar steps. In the DJI GO app, the currently selected image format is displayed on the second row of icons at the top of the screen.
- Open the DJI GO 4 app.
- If needed switch to photo mode. If the icon above the shutter button is a video camera, then click the icon. When in photo mode the icon will be a photo camera instead of a video camera.
- Tap the settings button under the shutter button.
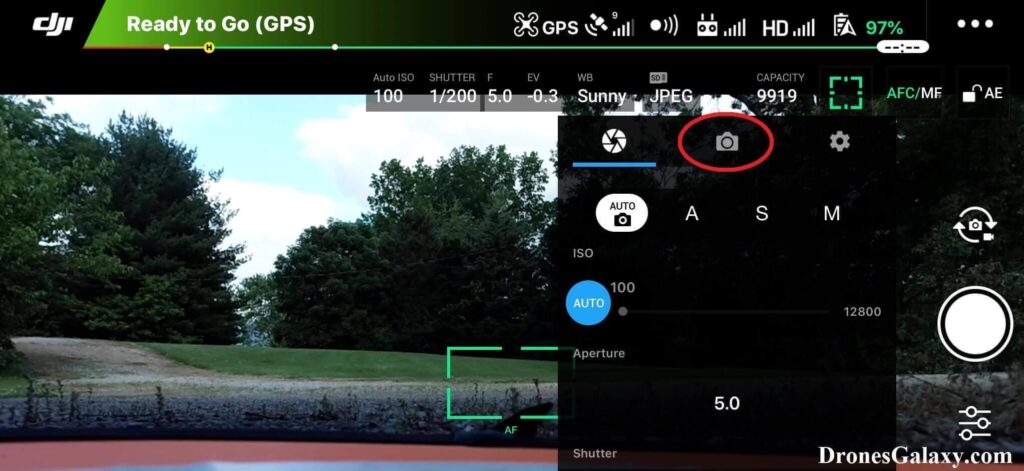
4. The camera settings menu will open. Tap the camera icon in the middle.
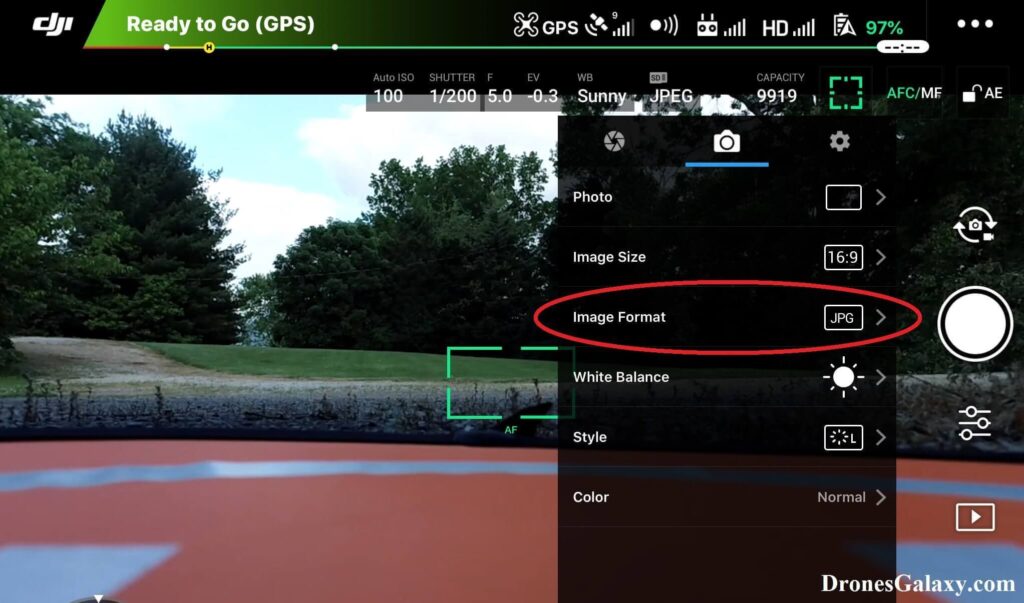
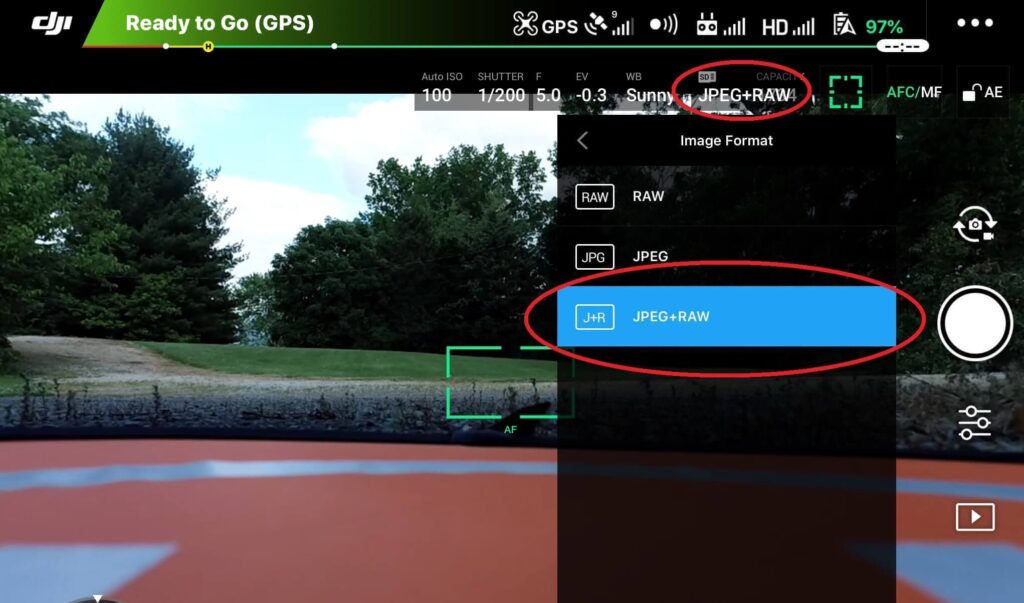
5. Tap Image Format.
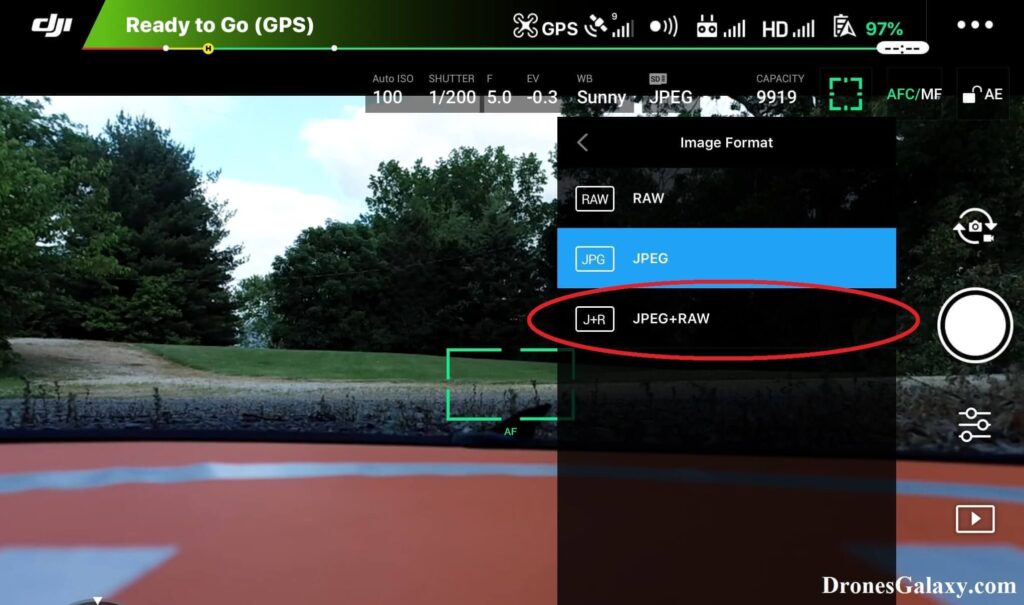
6. In the Image Format menu the currently selected image format will be highlighted. Tap the image format that you would like to use.
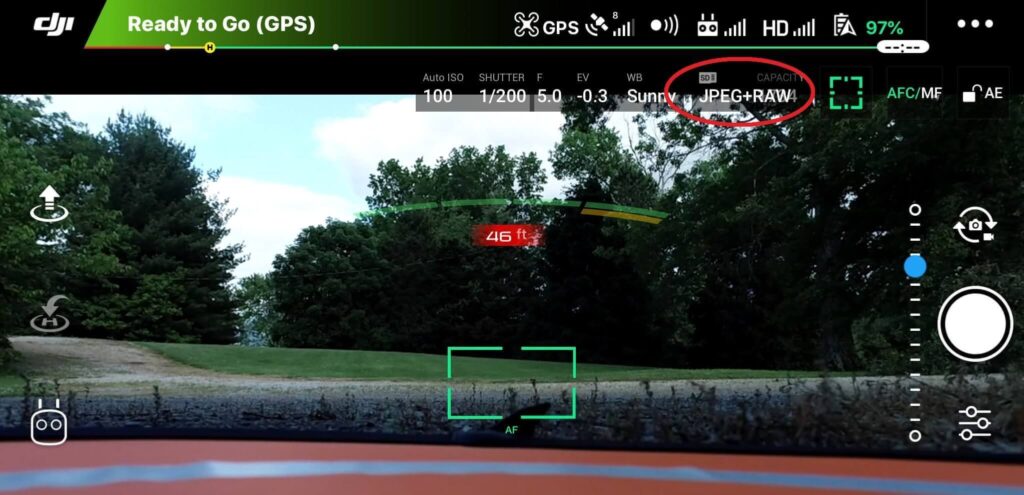
7. After selecting the image format, the second row at the top will be updated with the selected image format.
8. Click anywhere on the main screen to remove the camera settings menu. The second row at the top of the DJI GO app will continue to show the selected image format.
Conclusion
DJI drones can save photos as JPEG, RAW (DNG), or both JPEG and RAW (DNG). There are pros and cons of each format. If you have a large SD card then the JPEG+RAW image format may be the best option to have both types of files.
Here are some more articles you may be interested in:
Review Of KINBON Drone Landing Pad
Review Of Smatree Phantom 4 Battery Charging Hub
Six Simple Accessories To Improve Aerial Photo/Video Flights