This page contains affiliate links to Amazon. As an Amazon Associate I earn from qualifying purchases.
On DJI drones (Inspire, Phantom, Mavic, Spark), the horizon in photos or video footage can sometimes be tilted. This can be frustrating if you have devoted time to driving to a location to fly and believe that you have captured beautiful scenery. To fix this issue the gimbal needs to be calibrated so that the camera is level. Gimbal auto calibration is a step that I normally perform before each take off to make sure I do not find out later that the footage I expected to be great is flawed by being tilted. In my experience with the DJI Phantom 4 Pro drones the gimbal auto calibration usually completes within twenty to thirty seconds.
Steps To Calibrate The Gimbal
The following steps were written using the DJI Phantom 4 Pro V2. However, other DJI drones like the Mavic and Spark will have the same or very similar settings.
- Place the drone on a flat level surface and remove the plastic cover that holds the gimbal and remove the foam padding that goes behind the gimbal.
- Open the DJI GO 4 app.
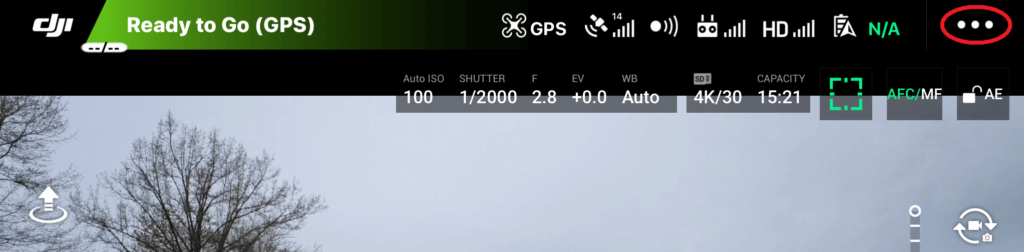
- Tap the three dots on the upper right side.
4. From the side menu that displays, click the camera icon to display the Gimbal Settings screen.
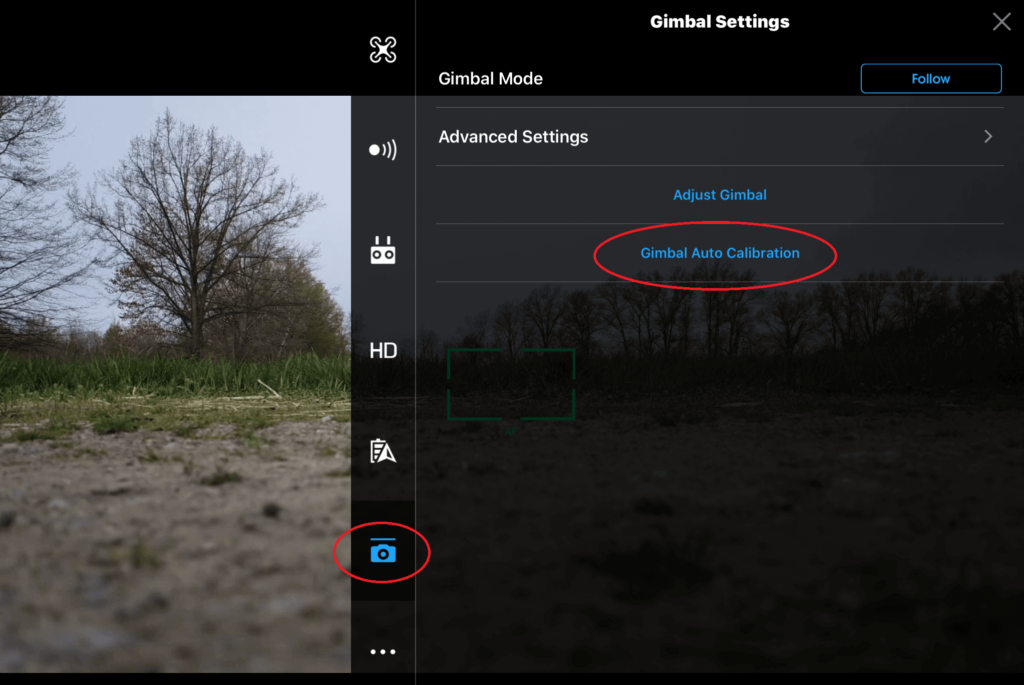
5. Click Gimbal Auto Calibration.
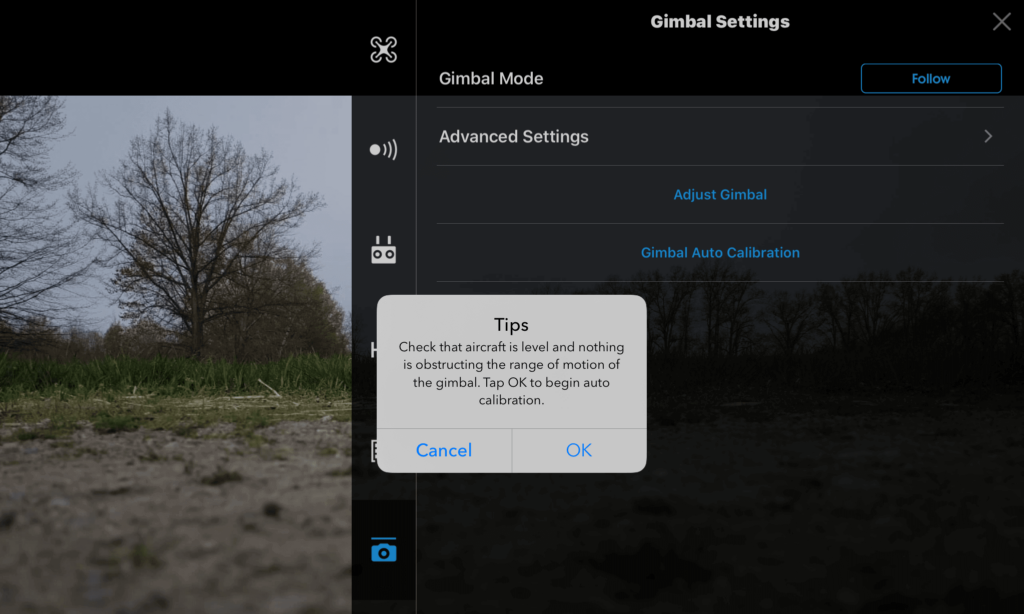
6. A message will be displayed to make sure that the drone is level and there are no objects to prevent the range of motion of the gimbal. Click OK.
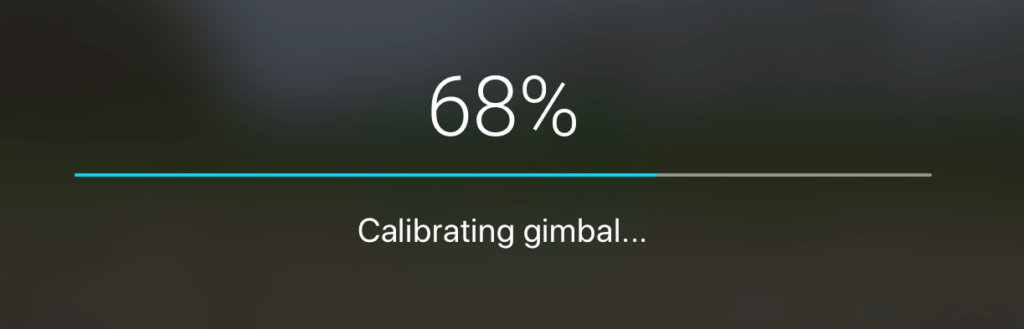
7. After clicking OK, the gimbal will begin calibration and will rotate around in different directions. The percentage progress will be displayed on the screen.


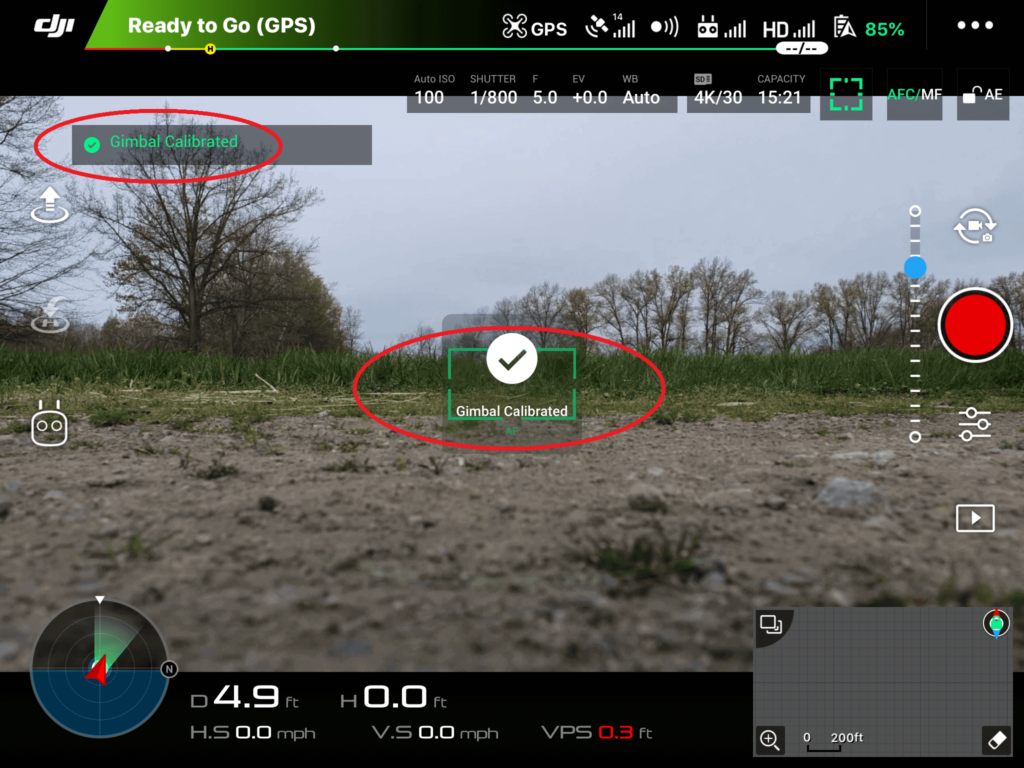
8. When calibrating is complete a Gimbal Calibrated message will be displayed on the main screen of the DJI GO app.
Conclusion
The above steps are a quick way to ensure that your aerial photos and videos come out as expected with an even flat horizon.
Here are some more articles you may be interested in:
Review Of Holy Stone HS210 Mini Drone