This page contains affiliate links to Amazon. As an Amazon Associate I earn from qualifying purchases.
The DJI series drones such as the Phantom series and Mavic series have multiple options for color settings for taking photos. One of these options is for black and white photos. Black and white photography is often used as a creative choice or for more technical reasons such as removing distractions from the photo.
Steps To Take Black & White Photos
The following steps were written using the DJI Phantom 4 Pro V2. The other DJI drones like the Inspire or Mavic series will have the same or similar steps.
- Open the DJI GO 4 app.
- If needed switch to photo mode. If the icon above the shutter button is a video camera, then click the icon. When in photo mode the icon will be a photo camera instead of a video camera.
- Tap the settings button under the shutter button.
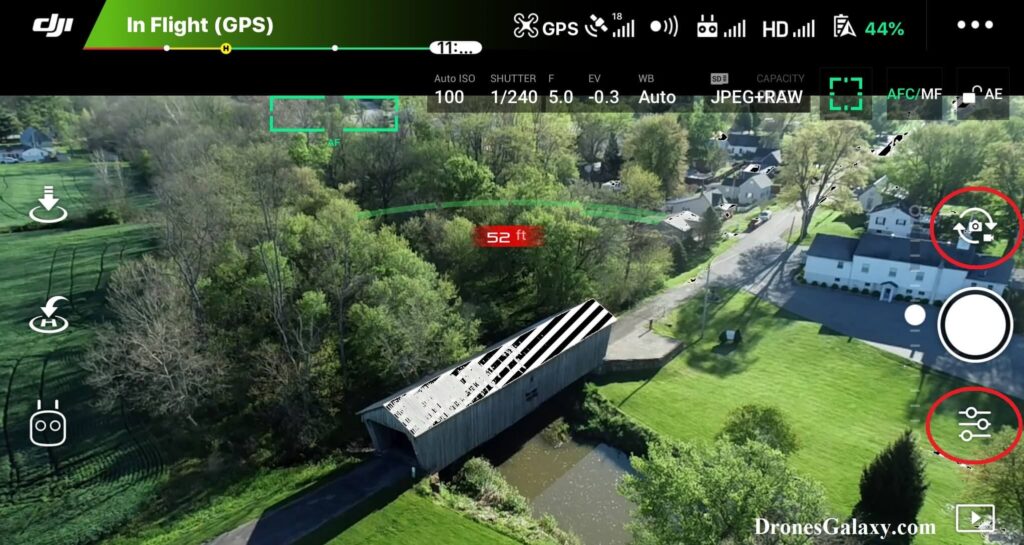
4. The camera settings menu will open. Click the camera icon in the middle.
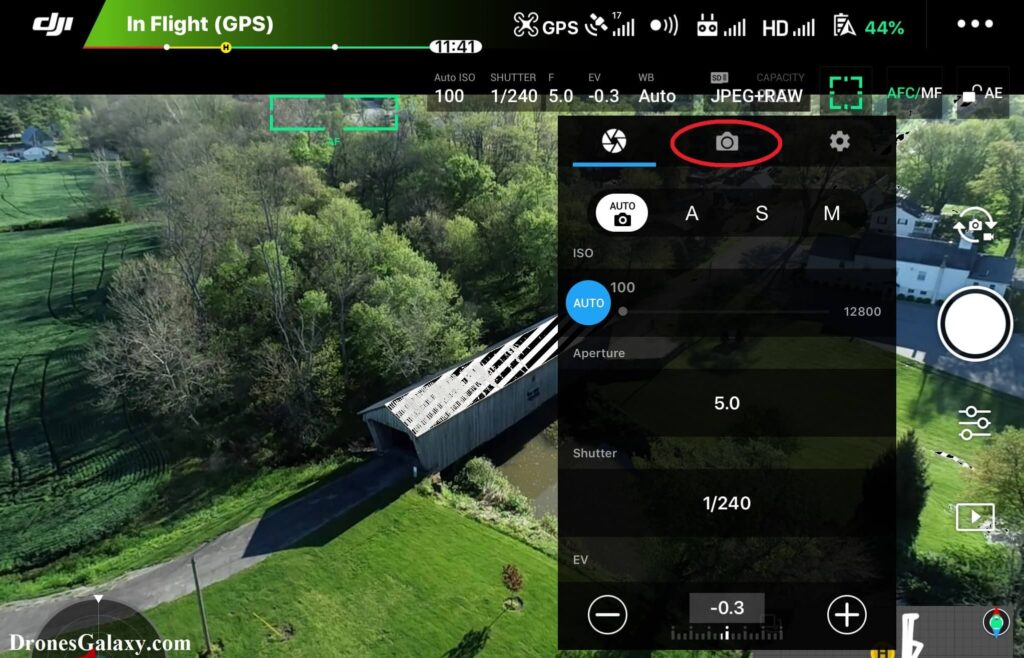
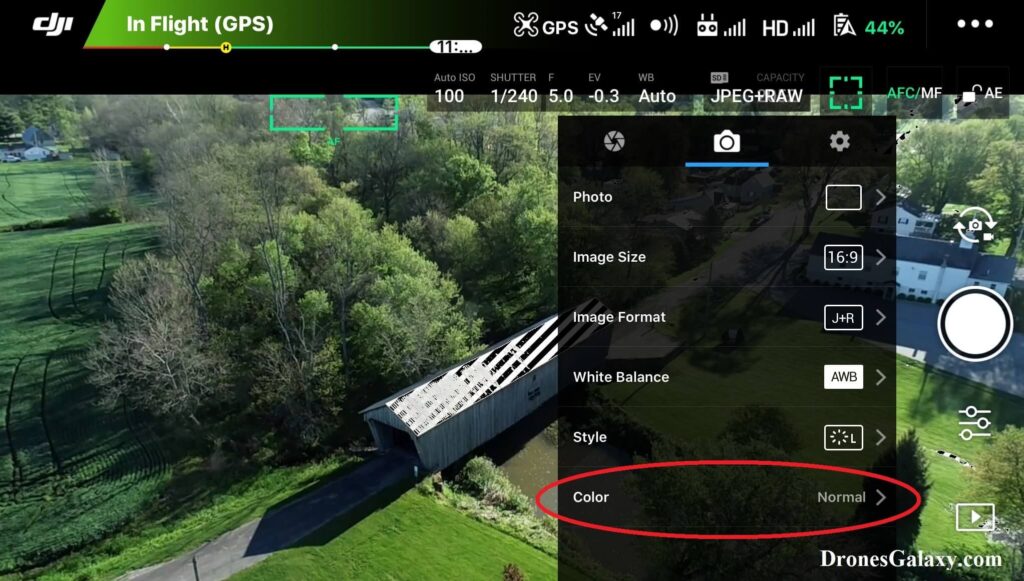
5. Tap the Color button.
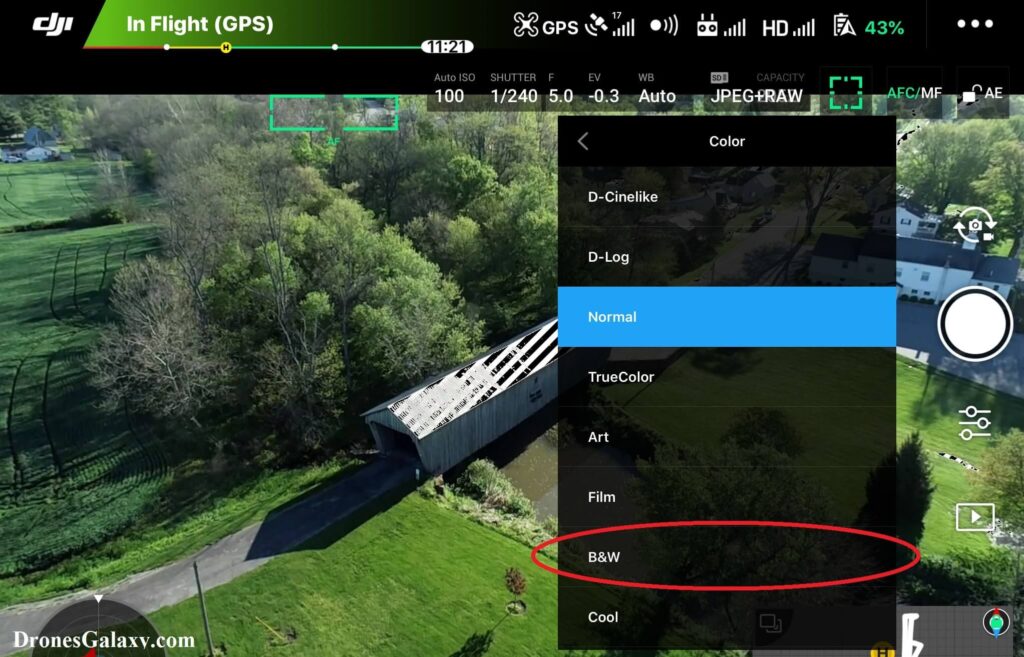
6. Tap B&W. This is short for Black & White.
7. From the screenshot below you can see that when B&W is clicked the scene turns black and white. You can now click the shutter button to take black and white photos.
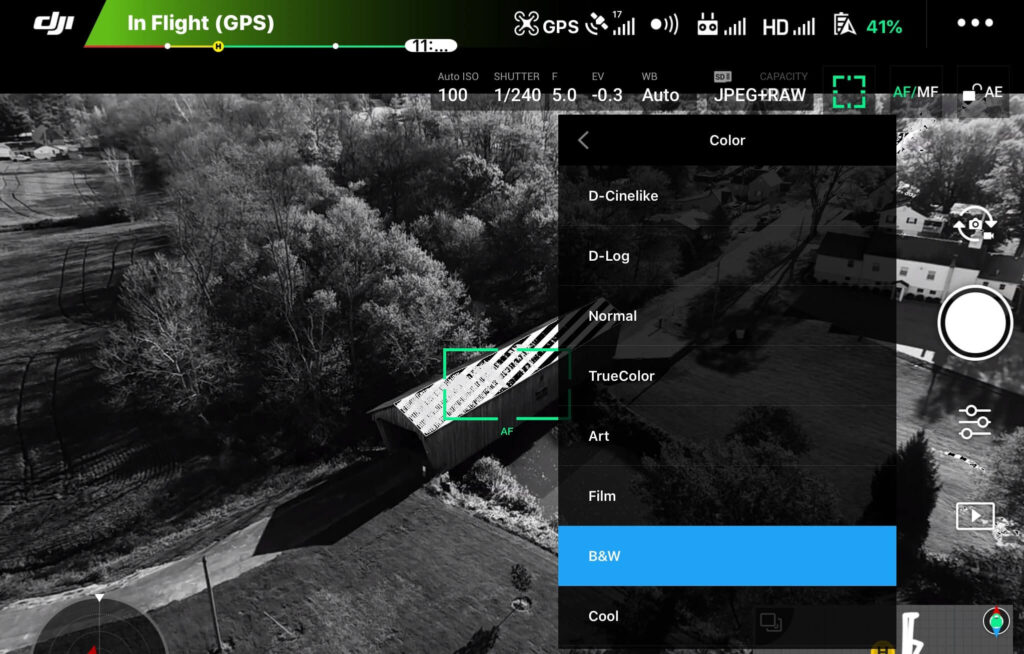
8. When you are done taking black and white photos you can use the same directions to change the color option back. Normal is the default color option.
Conclusion
Black and white photography is another option that can be used with DJI drones to make your aerial photos special. Using the above instructions you can quickly switch to taking black and white photos and then switch back to taking color photos.
For more information about the other color profiles available, check out this post: DJI Drones – How To Change Color Mode For Aerial Photos And Videos
Here are some other articles you may be interested in:
DJI Drones – How To Change The Image Format (JPEG vs RAW vs JPEG+RAW)
